

Alternatives to Machine Washing Graphic Shirts
Table of Contents
- Why Machine Washing Damages Graphic Shirts
- Hand Washing Graphic Tees: The Step-by-Step Method
- How to Remove Stains from Graphic Shirts Without Ruining the Print
- How to Dry Graphic Tees Without Cracking
- Spot Cleaning for Quick Touch-Ups
- When Machine Washing Still Makes Sense
- Storage and Ironing Tips to Extend Print Life
- Repairing Minor Print Cracks and Peeling
- Conclusion
- Frequently Asked Questions
Last Updated: September 8, 2026
Most graphic tee owners have watched a favorite shirt fade, crack, or peel after just a few washes. The culprit is usually the washing machine, which batters prints with friction, heat, and harsh agitation. That's why exploring alternatives to machine washing graphic shirts is the smartest move you can make for print longevity.
The core principle is simple: graphic shirts feature a layer of ink or vinyl bonded to the fabric surface. Machine washing subjects that bond to repeated stress, which accelerates cracking and peeling. By switching to gentler methods, you can dramatically extend the life of your prints and keep colors vibrant for years rather than months.
Why Machine Washing Damages Graphic Shirts
Machine washing is the single biggest threat to printed apparel because it combines several damaging forces at once. The tumbling action creates friction between the shirt and other fabrics, while the spin cycle stretches and twists the garment. This mechanical stress directly impacts the adhesive bond between the print and the fabric fibers.
The wash cycle itself introduces other problems. Hot water can break down the binders in plastisol and water-based inks, while high spin speeds pull at the fabric weave and distort the shirt's shape (peer-reviewed research). Fabric softeners and bleach are especially harmful, as their chemical compounds coat fibers and degrade the print layer over time.
Here's what typically goes wrong:
- Cracking happens when the ink film loses flexibility and develops fine fractures
- Peeling occurs when the adhesive bond fails and edges lift away from the fabric
- Fading results from dyes and pigments breaking down under heat and chemical exposure
- Shrinkage distorts the fabric, causing the print to pucker or look warped
Hand Washing Graphic Tees: The Step-by-Step Method
Hand washing is the gold standard for preserving graphic shirts because it gives you complete control over water temperature, agitation, and pressure. But not all prints are created equal. Screen-printed plastisol inks form a thick, plastic-like layer that is durable but prone to cracking if flexed while cold. Water-based prints soak into the fabric fibers, making them softer but more susceptible to fading from excessive soaking. DTF (direct-to-film) transfers use a thin adhesive layer that can delaminate if you scrub too hard, while vinyl heat transfers are the most rigid and will crack at the edges if the fabric is stretched during washing.
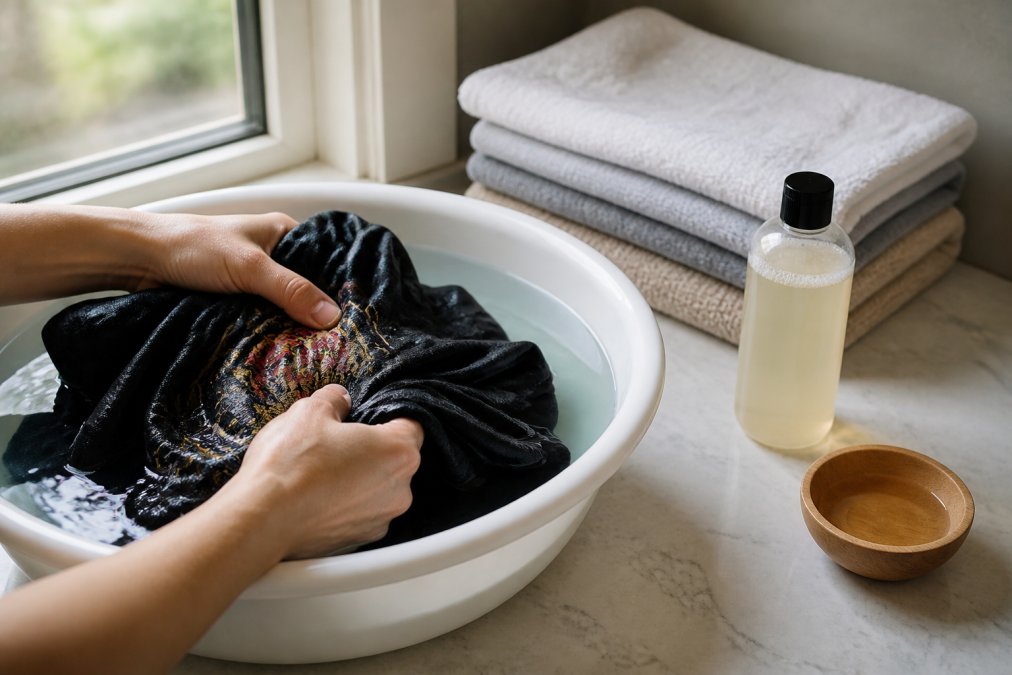
Before you start, check the shirt's care label and identify the print type. For vintage or high-value prints, especially those with plastisol layers that have already begun to show fine crazing, use the most conservative protocol below.
Follow these steps for a thorough hand wash that protects the print's bond to the fabric:
- Turn the shirt inside out to protect the print surface from direct friction, but also to allow you to see the back of the print. If you notice the adhesive layer is lifting or the fabric behind the print is thinning, reduce agitation further.
- Fill a clean basin or sink with cool water (below 70°F is ideal). Hot water softens the binders in plastisol ink and can cause DTF adhesive to fail prematurely.
- Add a small amount of mild detergent, specifically one that is free of optical brighteners and enzymes. Products like Woolite Darks or a dedicated sport detergent (e.g., Hex Performance) are formulated to be gentle on both dyes and synthetic print layers. Avoid any detergent labeled "heavy-duty" or "stain-fighting," as these often contain bleach alternatives that weaken print adhesion.
- Submerge the shirt and gently agitate by hand for 2-3 minutes. Use a kneading motion rather than rubbing the fabric against itself. Focus on the underarm areas and collar, but do not pull or stretch the fabric where the print sits. For vinyl prints, avoid folding the shirt sharply across the design, as this creates a crease point that can crack the vinyl.
- Let it soak for 5-10 minutes, but no longer. Extended soaking can cause water-based inks to bleed and can weaken the adhesive in DTF transfers. If the shirt is heavily soiled, change the water and repeat the agitation step rather than extending the soak.
- Drain the soapy water and rinse with fresh cool water until the water runs clear. For the final rinse, you can add one tablespoon of white vinegar to help neutralize detergent residue, which is especially important for DTF prints that can attract lint when residue is left behind.
- Press out excess water by rolling the shirt in a clean, dry towel. Never wring or twist, as this torsional stress is the primary cause of cracking in thick plastisol prints and edge-lifting in vinyl.
The entire process takes about 15 minutes and is far gentler than any delicate cycle on a machine. For best results, wash graphic tees separately from other garments to avoid any color bleeding or snagging. If you are washing multiple graphic shirts, sort them by print type, do not wash a heavy vinyl print with a delicate water-based print.
How to Remove Stains from Graphic Shirts Without Ruining the Print
Stain treatment on graphic shirts requires a careful balance: you need enough cleaning power to lift the stain, but not so much that you damage the print. The key is to treat stains immediately rather than letting them set into the fabric.
For food and beverage stains: Apply a small drop of mild dish soap directly to the stain, then gently work it in with your fingertips or a soft-bristled brush. Rinse thoroughly with cool water.
For oil and grease marks: Sprinkle a small amount of cornstarch or baking soda onto the stain and let it sit for 15 minutes to absorb the oil. Brush it off, then treat with a drop of gentle detergent before rinsing.
For sweat and deodorant buildup: Create a solution of cool water and a small amount of gentle detergent, then soak only the affected area for 30 minutes. Avoid rubbing the print itself, as this can cause cracking.
How to Dry Graphic Tees Without Cracking
Drying method matters just as much as washing, and air drying is the only safe choice if you want to prevent print cracking. The heat from a tumble dryer softens the ink film, and as the shirt tumbles and cools, the print can develop hairline fractures that eventually become visible cracks (peer-reviewed research).
Lay the shirt flat on a clean, dry towel or a drying rack, reshaping it gently to its original dimensions. This flat dry method prevents stretching and helps the shirt keep its shape.
Hang dry is acceptable as a second choice, but use a wide plastic hanger rather than a wire one to avoid creating shoulder bumps. Always hang the shirt by the bottom hem with clothespins, or drape it over the hanger's crossbar, to avoid stretching the neckline.
What to avoid:
- Direct sunlight can fade the print's colors, so dry in a shaded area or indoors
- Tumble drying exposes the shirt to heat and friction that cause shrinkage and cracking
- Wringing or twisting distorts the fabric weave and stresses the print bond
If you must use a dryer for some items, select the lowest heat setting and remove the shirt while still slightly damp, then finish with air drying.
Spot Cleaning for Quick Touch-Ups
Not every mark requires a full wash, and spot cleaning is the best way to handle small blemishes without subjecting the whole shirt to unnecessary handling. This technique is ideal for graphic tees worn once or twice that just need a quick refresh.
Dip a clean white cloth into cool water and blot the stained area gently, working from the outside of the stain toward the center to prevent spreading. If water alone isn't enough, add a tiny drop of mild detergent to the cloth and continue blotting.
The advantages of spot cleaning are clear:
- It preserves the overall fabric integrity and print quality
- It takes only a few minutes per stain
- It reduces the frequency of full washes, which extends print life
After spot cleaning, rinse the area by blotting with a damp cloth, then pat dry with a towel. Allow the spot to air dry completely before wearing or storing the shirt.
When Machine Washing Still Makes Sense
Hand washing isn't always practical, especially for busy professionals or parents juggling multiple responsibilities. The good news is that machine washing can still work for graphic shirts if you follow the right precautions.
This simple tool dramatically reduces friction and prevents snags that can catch and pull at the print edges.
When machine washing is your only option, follow these rules:
- Turn the shirt inside out before placing it in the mesh bag
- Use the delicate cycle with cold water only, never warm or hot
- Set the spin speed to low to minimize stress on the fabric
- Wash with similar colors to prevent any color bleeding
- Skip the fabric softener and choose a mild, dye-free detergent
Storage and Ironing Tips to Extend Print Life
How you store and iron graphic shirts affects print longevity just as much as washing. Most care guides stop at washing advice, but the way you store a shirt between wears is often what determines whether a print lasts two years or ten. The core principle is that prints, whether plastisol, DTF, or vinyl, are rigid layers bonded to a flexible fabric.
Folding vs. Hanging: The Print-Type Decision
The common advice is to fold all graphic tees, but that is an oversimplification. The right choice depends on the weight of the print and the fabric.
If you do hang, use a wide, padded hanger (at least 1.5 inches wide) to distribute the weight across the shoulders. Never use wire hangers, which create pressure points that can crack vinyl prints. For heavier prints, fold the shirt over the hanger's crossbar rather than draping it by the shoulders.
The Correct Folding Method for Prints
When folding, avoid creating a sharp crease directly across the print. A crease is a permanent stress point that will eventually crack even the most flexible ink. Instead, use the following method:
For shirts with large chest prints, consider rolling them instead of folding. Rolling eliminates crease points entirely and is the preferred method for storing vintage graphic tees in archival collections.
Environmental Factors That Degrade Prints
Storage location matters more than most people realize. The three environmental enemies of graphic prints are:
Ironing Without Damaging the Print
Ironing graphic shirts requires special caution because direct heat will melt or crack the print. The safe approach:
If you need to remove wrinkles without an iron, hanging the shirt in a steamy bathroom for a few minutes often does the trick without any heat contact.
Repairing Minor Print Cracks and Peeling
Even with careful washing, prints can eventually show signs of wear. While you can't fully restore a badly damaged print, you can address minor cracking and peeling to extend the life of the shirt.
Apply it sparingly under the lifted edge with a toothpick, press the print back down, and place a weight on top while it dries. This works best for small areas and can add months of wear to a favorite shirt.
Apply a thin layer over the affected area and let it dry completely before wearing. This won't make the cracks disappear, but it stabilizes the print and prevents further damage.
When a shirt reaches the end of its useful life, consider repurposing it as a cleaning rag or cutting it into a patch for another project. This keeps the garment out of a landfill and gives it a second purpose.
Conclusion
Caring for graphic shirts doesn't have to be complicated, but it does require moving beyond the convenience of the washing machine. By hand washing in cold water, air drying flat, spot cleaning between washes, and storing properly, you can keep your prints looking sharp for years instead of months.
At Ortrends, we design our graphic apparel with premium quality materials meant to keep up with your active lifestyle. Our made-to-order shirts and hoodies feature original, meaningful prints on soft, durable fabric, crafted with care and shipped quickly from California. Get started with Ortrends and give your favorite graphic shirts the care routine they deserve.
Frequently Asked Questions
Is it okay to put graphic tees in the dryer?
No, the heat from a dryer is one of the main causes of print cracking and peeling. The tumbling action also creates friction that can damage the design. Air drying is the safest method for any graphic shirt. If you must use a dryer, select the lowest heat or air-only setting and remove the shirt while it is still slightly damp.
Can I spot clean graphic prints without soaking the whole shirt?
Yes, spot cleaning is often the best first approach for small marks. Mix a tiny drop of mild detergent with cool water. Dip a soft cloth or cotton swab into the solution and gently dab the stained area. Do not scrub, as this can rub the print off. Rinse the area with a clean, damp cloth and pat dry.
Is oxiclean safe for graphic tees?
Oxygen-based cleaners like OxiClean are generally safer for prints than chlorine bleach, but they are not risk-free. Always test on a small, hidden area of the shirt first. Use a diluted solution and do not soak the shirt for longer than 15 minutes, as prolonged exposure can weaken the fibers and the print adhesive. Rinse thoroughly afterward.
What is the best way to hand wash graphic shirts?
Fill a clean basin or sink with cool water and add a small amount of mild liquid detergent. Submerge the shirt inside out and gently squeeze the fabric to work the soap through. Avoid twisting or wringing. Drain the soapy water and refill with clean cool water to rinse. Press the shirt against the side of the basin to remove excess water, then lay it flat on a towel to dry.